Crochet 101
What You Need to Get Started
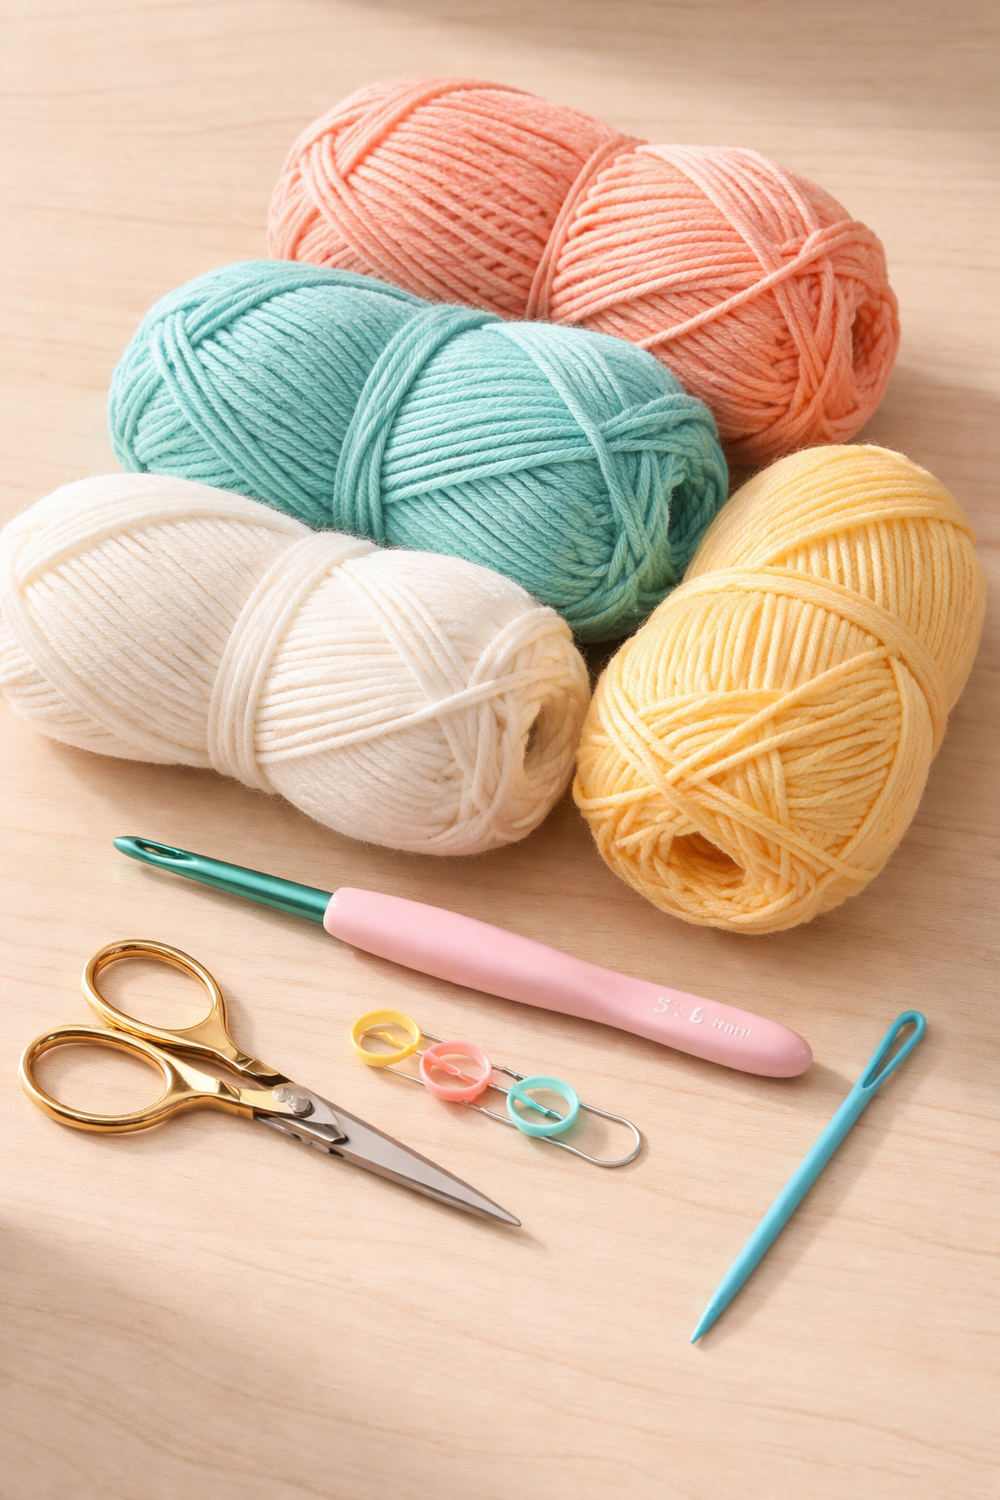
Essential Supplies:
Worsted weight yarn (#4)
5 mm crochet hook (H)
Scissors
Yarn needle
Stitch markers
Tip: Start with light-colored acrylic yarn so you can see your stitches clearly.
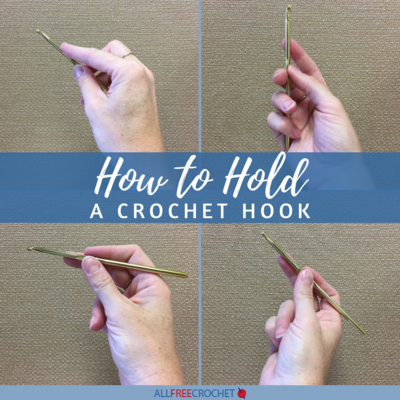
How to Hold Your Hook & Yarn:
You can hold your hook with your dominant hand in either the pencil grip or the knife grip.
✏️ Pencil Grip
Hold the hook like a pencil
Great for precision and control
Common for beginners
🔪 Knife Grip
Hold the hook like a knife
Feels more natural for some people
Good for longer crochet sessions
There is no “right” way—use what feels comfortable.
Basic Yarn Hold (Beginner Method):
Wrap yarn over your index finger
Let yarn rest across your other fingers
Use your index finger to guide the yarn
Hold the slip knot with your thumb and middle finger
Keep the yarn slightly taut—not tight
Basic Crochet Stitches
Slip Knot:
(Your starting point) Place the hook through a loop of yarn leaving a 4 - 5” tail, then pull the working yarn through
the loop. Tighten.
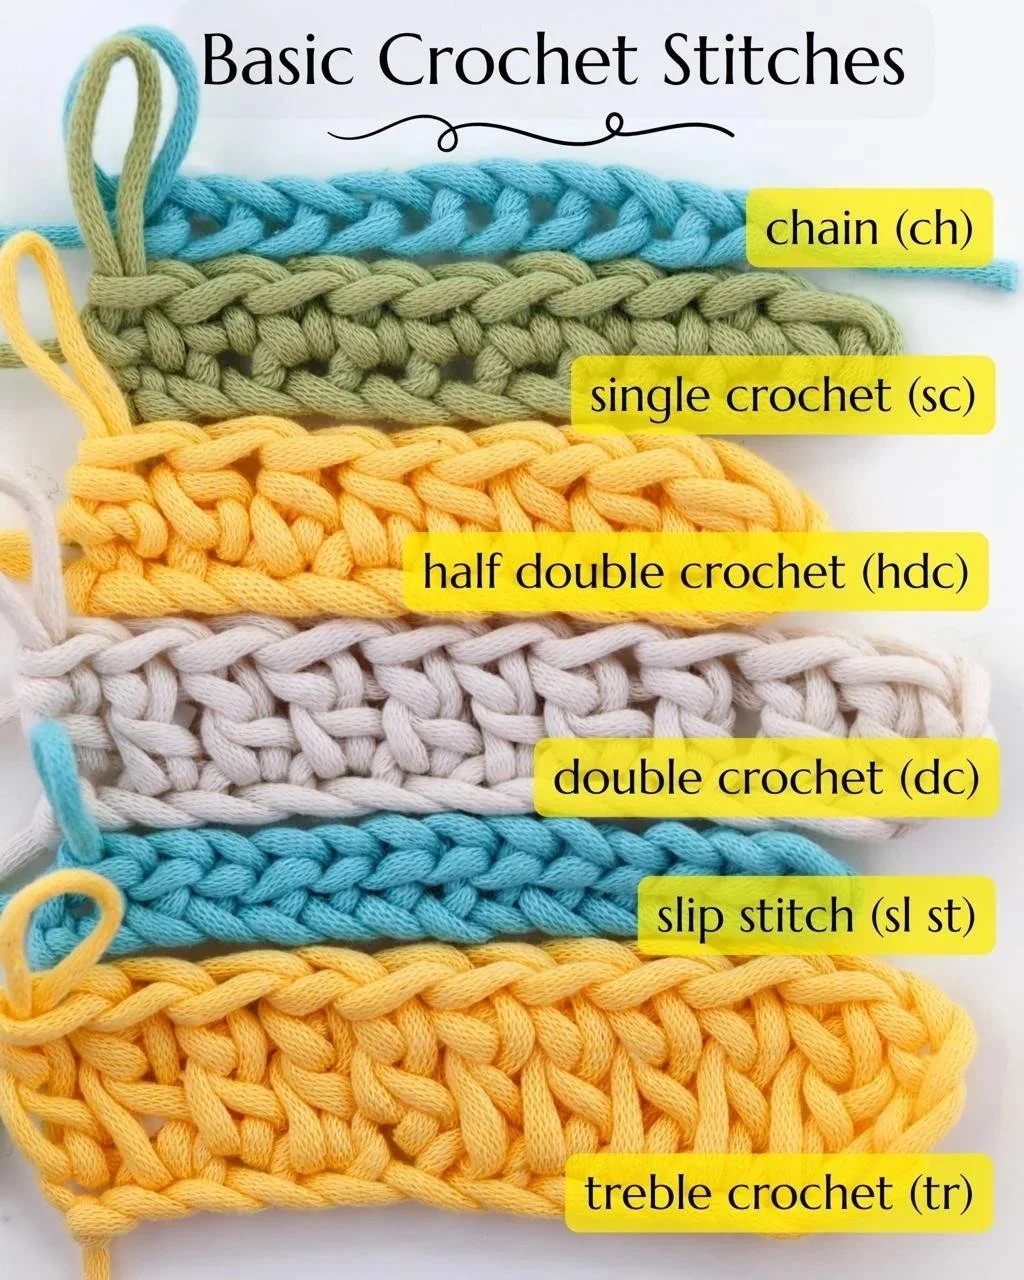
Chain Stitch:
Most crochet projects begin with a foundation chain. This is where you will work your project stitches. Wrap the yarn around your hook from the working yarn end (yarn over) and pull through the loop on the hook. Yarn over, pull through, repeat.
Repeat this several times to practice holding the yarn and hook and creating the right tension.
Single Crochet:
Insert hook in stitch or space indicated. Yarn over and pull up a loop. Yarn over and draw through both loops on hook.
Half Double Crochet:
Yarn over, insert hook in stitch or space indicated, yarn over and pull up a loop, yarn over and draw through all 3 loops on hook.
Double Crochet:
Yarn over, insert hook in stitch or space indicated, yarn over and pull up a loop (3 loops on hook) . Yarn over and draw through 2 loops on hook, yarn over draw through remaining 2 loops on hook.
Treble Crochet:
Yarn over twice, insert hook in stitch or space indicated, yarn over and pull up a loop (4 loops on hook). Yarn over and draw through 2 loops, 3 times.
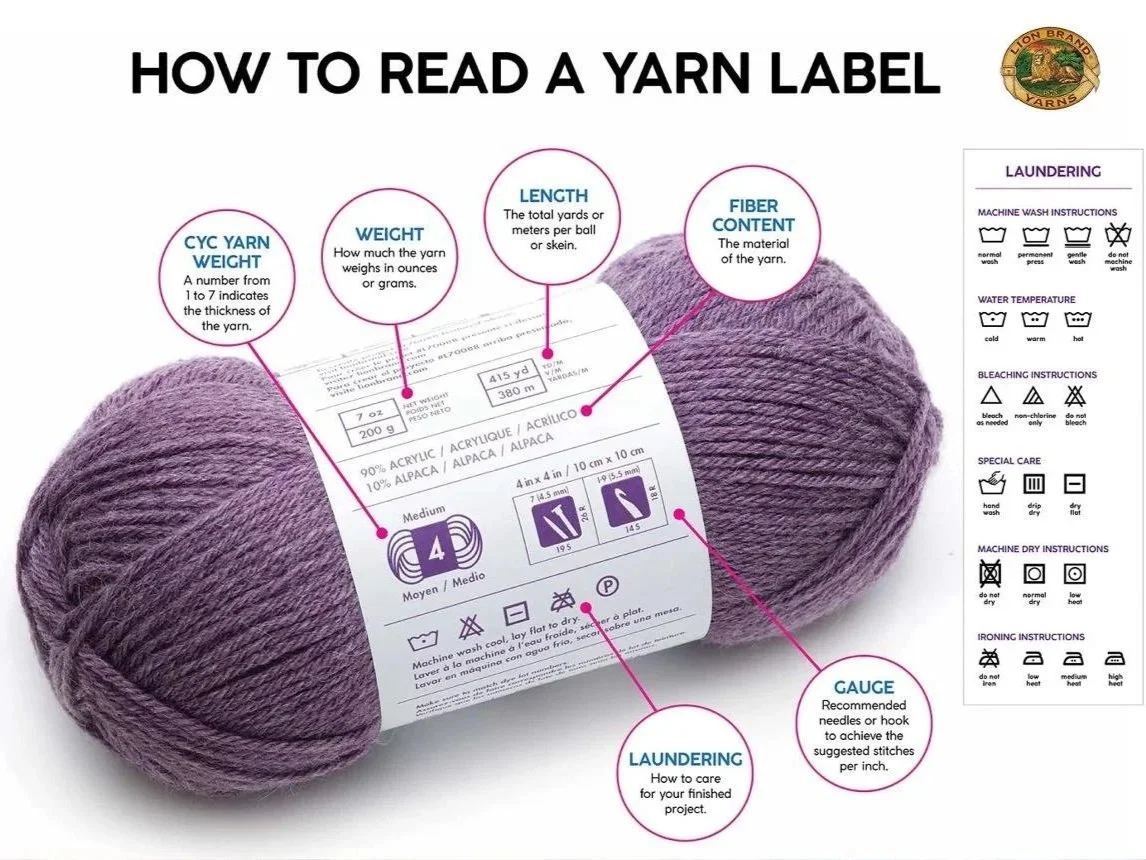
How to read a yarn label
The picture to the right shows a yarn label with important information.
1 ) CYC Yarn Weight.
This icon shows the weight of the yarn which is important to know when choosing a crochet hook.
2.) Weight
This will show how much the yarn weits in ounces or grams.
3) Length
The totals yards or meters per ball or skein. Important for calculating yardage for a pattern.
4) Fiber Content
The material of the yarn (Acrylic, Wool, Cotton)
5) Laundering
Care instructions for your finished project.
6) Gauge
Recommended needles or hook side to acheive the suggested stitches per inch.
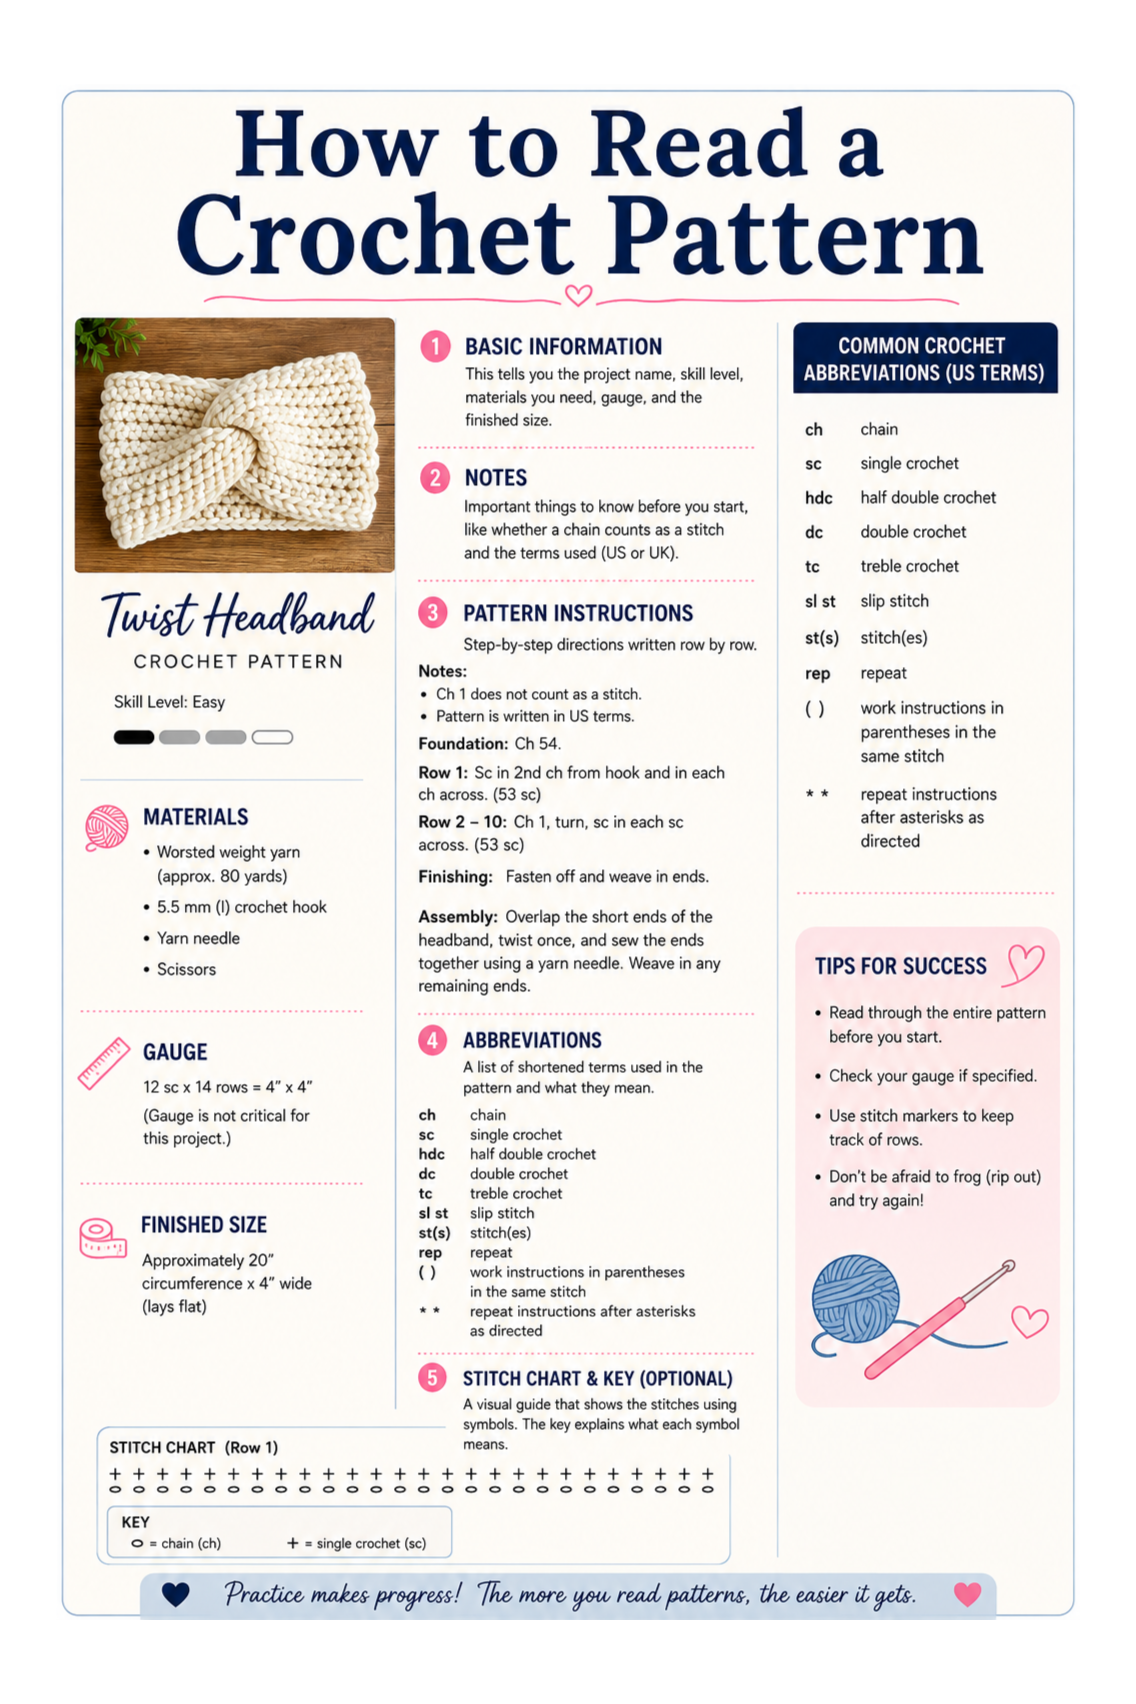
How to Read a Crochet Pattern
A simple guide for beginners
What Is a Crochet Pattern?
A crochet pattern is a set of written instructions that tells you:
What stitches to use
How many stitches to make
The order to follow
Think of it like a recipe—but for yarn
1. Start with the Pattern Information
Before you begin, read the top section carefully. It usually includes:
Skill level (Beginner, Easy, Intermediate)
Materials (yarn, hook size, tools)
Finished size
Gauge (how tight or loose your stitches are)
Notes (things you should know before starting)
Special stitches (special stitches other than basic stitches used)
Skipping this step is the #1 beginner mistake!
2. Learn Common Abbreviations (US Terms)
Patterns use short abbreviations to keep things simple:
ch = chain
sc = single crochet
hdc = half double crochet
dc = double crochet
sl st = slip stitch
inc = increase (2 stitches in one)
dec = decrease
Most patterns include a key—always check it!
3. Understanding Pattern Repeats
Many patterns have repeats and they are abbreviated like this:
You’ll often see something like:
sc, inc x6
This just means you repeat that sequence 6 times.
Repeats make patterns easier to write and follow, and once you get used to them, they feel very natural.
4. Working in Rows vs Rounds
Rows (back and forth)
Turn your work at the end of each row
Common for scarves, blankets
Rounds (in a circle)
Do NOT turn
Use a stitch marker
Common for hats, amigurumi
5. Stitch Counts Matter
At the end of each row/round, you’ll see a number:
Example:
sc, inc x6 (18)
The (18) = total stitches you should have
Always count your stitches—this prevents mistakes later!
6. Special Pattern Terms
Magic Ring (MR): Adjustable starting loop
Yarn Over (YO): Wrap the yarn around the hook
Back Loop Only (BLO): Work in back part of stitch
Front Loop Only (FLO): Work in front part
Fasten off: Cut yarn and secure
7. Reading Step-by-Step
Example pattern line:
Round 3: sc, inc x6 (18)
This means:
Work 1 single crochet
Then 2 single crochet in next stitch
Repeat that 6 times
You should end with 18 stitches
Beginner Tips
Go slow—don’t rush
Read the whole pattern before starting
Use a stitch marker
Highlight or check off rows as you go
It’s okay to undo and try again
Every stitch is progress!
Parentheses, Asterisks, and Brackets
As you start reading crochet patterns, you’ll notice that patterns don’t just use abbreviations — they also use symbols to help guide you through repeated steps.
At first, these symbols can look a little confusing, but once you understand what they mean, patterns become much easier to follow.
Parentheses: Parentheses are used when you work more than one stitch into a space. For example:
Row 1: Ch 1, (dc, ch2, dc) Which is in the first Row, Chain 1, work a double crochet, a chain 2, then another double crochet in the same stitch.
Asterisks: Crochet patterns often repeat the same group of steps several times across a row. Instead of writing those same directions out over and over, the pattern uses asterisks (*) to show you where the repeated section begins.
For example:
Row 3: Dc in the next 2 sts, ch 1, skip next st, dc in the next st. Rep from across the row.
Here you would repeat the steps after the * as many times as you can until you reach the end of the row.
Brackets: Brackets are used to indicate how many times you work a repeat across the row or round.
For example:
Row 7: Dc in next 3dc, ch 1, [sk next dc, 3dc in next dc] 4 times, ch 1, dc in next 4 dc.
This means that after you double crochet in the next 3 stitches, you will repeat the steps following the asterisk — chain 1, skip the next stitch, and 3 double crochet in the next stitch — all the way across the row.